A beginner's guide on how to use Stellarium
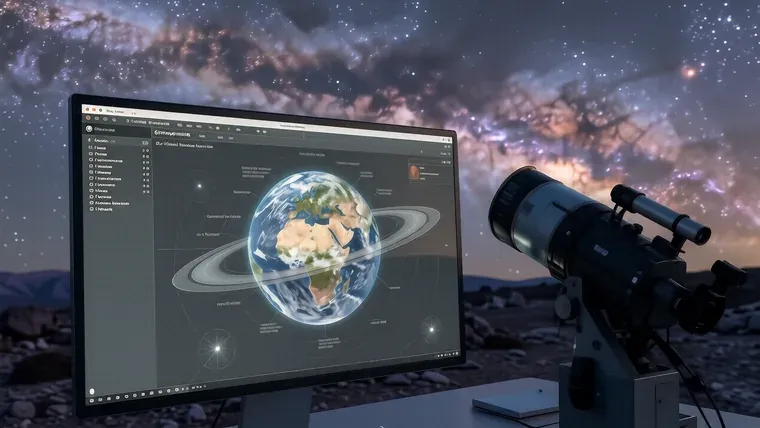
Stellarium functions as a virtual planetarium that simulates the night sky in real-time using a database containing over 600,000 stars and more than 177 million additional stellar entries. You can use it to plan observations or identify celestial objects by matching your local horizon with the digital display. It works on Windows, macOS, and Linux because the software relies on the Qt interface for cross-platform compatibility.
Core Configuration and Setup
The first step is essential. You must verify your geographical coordinates and the system time after you launch the application for the first time. Stellarium pulls this data from your operating system, although manual adjustments via the wrench icon in the bottom toolbar allow for much higher precision. If the software detects the wrong location, click the wrench to open settings and navigate to the “Location” tab. You can use a map or enter specific longitude and latitude values so that the sky matches your actual viewing site.
Accuracy matters deeply. Check the “Date and Time” tab next to the location settings to ensure the simulation reflects your intended observation window. Many users forget this step while they are busy adjusting star catalogs. If you plan to observe a specific transit, you should set the time manually because the default setting follows your computer’s internal clock.
Settings can be saved. Once you finish your configuration, click “Make default settings” so that the program loads these exact parameters every time you restart it. This saves significant time during repeated sessions.
Optimizing the Visual Interface
The interface has two sides. The left panel manages sky and observation settings, while the right side houses the object search and help windows. You can toggle constellation lines by pressing the [C] key on your keyboard. This is helpful for beginners. If you find the screen too cluttered, you should disable constellation art or labels because a dense field of text makes it difficult to focus on dim objects.
Night mode protects vision. Press [Ctrl+N] to tint the interface and constellation lines with a red hue so that your eyes maintain their dark adaptation during long sessions. Red light is less disruptive to rhodopsin levels in the retina. You should also reduce your monitor brightness to the minimum level while using this mode.
The sky changes appearance based on your settings. You can toggle the atmosphere by pressing [A] because removing the air layer allows you to see the Milky Way without atmospheric scattering. This view is useful for studying deep-sky structures.
- Press [E] to show the equatorial grid.
- Press [Z] to show the azimuthal grid.
- Use [Alt+P] to toggle planet names.
- Press [D] to hide or show deep-sky objects.
Navigating the Celestial Sphere
Moving through the stars requires specific inputs. You can hold the left mouse button to drag the sky around, which allows for a fluid exploration of different hemispheres. To focus on a specific target, click the magnifying glass icon in the search window. Once you select an object, press the Spacebar so that the software centers it in your field of view.
Zooming is necessary for planets. Use the mouse scroll wheel or the Page Up and Page Down keys to change your magnification level. If you want to see the moons of Jupiter, you must zoom in significantly because their apparent size is quite small.
The Earth rotates constantly. You must either pause the simulation using the [K] key or use the “Center the observed object” function because otherwise the target will drift out of your frame as the virtual Earth turns. This can be frustrating for new users.
Managing Star Catalogs and Magnitudes
Data density varies widely. The default catalog includes 600,000 stars, but you can add more to reach a total of over 177 million stars if your hardware allows it. High-performance computers handle this well. However, many amateur astronomers use older laptops that might struggle with such massive datasets, so you should consider using version 9.1 if your system lacks a dedicated 3D graphics card.
Limiting magnitude is a vital skill. When you configure the “Sky and View” options, set a limiting brightness for stars so that the screen does not become an illegible mess of points. If you use a 200mm telescope under dark skies, you might want to include objects up to magnitude 10. This is a practical limit because even though the software can show dimmer stars, your physical equipment has its own constraints.
Remember that brightness is deceptive. A globular cluster with a magnitude of 10 may appear easier to find than a diffuse nebula with a magnitude 8 because the light from a cluster is concentrated in a smaller area. You should study these differences in the catalog before heading outside.
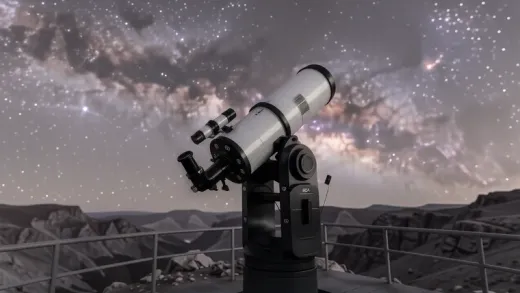
Simulating Telescope Observations
Stellarium includes a telescope simulator. This tool allows you to choose specific eyepieces and lenses through the “View in eyepiece” menu located in the top right corner. It helps with planning. You can simulate how a particular focal length will look while you are still sitting at your desk.
The plugin system adds depth. You can install additional modules for artificial satellites or even specialized telescope configurations so that the simulation feels more like a real-world experience. This is useful for advanced users.
To use the eyepiece view:
- Select an object in the sky.
- Click “View in eyepiece” in the top right panel.
- Choose your telescope model and lens from the dropdown menu.
- Adjust the magnification to see how the field of view changes.
Installation on Linux Systems
Linux users have several ways to install the software. The process is usually fast. You can use the terminal to pull the package from your distribution’s official repositories.
For Ubuntu or Debian, use the following command:
sudo apt install stellarium
If you want the most recent version on Ubuntu, you should add the PPA repository first because the standard repositories often lag behind the latest releases. Use sudo add-apt-repository ppa:stellarium/stellarium-releases before running the install command.
Arch Linux users can use Pacman:
sudo pacman -S stellarium
Fedora users should utilize DNF:
sudo dnf install stellarium
OpenSUSE requires the Zypper tool:
sudo zypper install stellarium
Flatpak and Snap also provide reliable installation paths for various Linux environments. These methods work well because they package all necessary dependencies within a containerized environment.
Mobile Applications and Hardware Constraints
The mobile version offers different utility. It uses the device’s accelerometer and GPS to show the sky based on how you hold your phone. This is helpful for field use. However, the Android version may lack some of the deep configuration options found in the desktop suite.
Hardware requirements are specific. For the desktop version, a 3D video card with OpenGL 3 technology is recommended so that the textures of nebulae and planetary surfaces render without lag. You need at least 1 GB of RAM for a smooth experience. If you have less than 512 MB, the software may crash during heavy simulations.
The mobile app provides a 3D map of over 600,000 stars. It is a useful tool for quick identification. You can point your phone at a planet to see its name and details instantly.
Advanced Simulation Features
Stellarium simulates complex events. You can observe the motion of satellites or even simulate the orbit of the Tesla Roadster if you have the appropriate data loaded. This provides a sense of scale. The software also allows for the simulation of novae and supernovae so that you can visualize the life cycles of stars.
Time control is a major advantage. You can use the [J], [K], [8], and [L] keys to rewind, pause, fast-forward, or return to the current time. This is useful for predicting when a meteor shower will reach its peak. You can also observe Iridium flares by enabling artificial satellite layers.
The fisheye effect is available for planetarium domes. This mode distorts the image so that it can be projected onto a curved surface without losing the continuity of the star field. It requires specific hardware to display correctly.
The software remains a standard in the community. Whether you are using the desktop version on a high-end workstation or the mobile app on an Android device, the data remains consistent across platforms. You can plan your next observation of the Messier catalog or search for a specific NGC object with confidence in the coordinates provided.
Frequently asked questions
How do I set my location in Stellarium?
Click the wrench icon in the bottom toolbar to open settings, then navigate to the 'Location' tab to manually enter your longitude and latitude or use a map.
What keyboard shortcuts can I use to change the view?
You can press [C] to toggle constellation lines, [A] to toggle the atmosphere, and [Ctrl+N] to enable red night mode for dark adaptation.
How many stars are included in the Stellarium database?
The software features a database containing over 600,000 stars and more than 177 million additional stellar entries.
Can I simulate looking through a telescope?
Yes, you can use the 'View in eyepiece' menu in the top right corner to select specific telescope models, lenses, and magnification levels.
More in Stargazing
The benefits of an apochromatic refractor
Learn how an apochromatic refractor uses ED glass and multiple lens elements to eliminate chromatic aberration for high-resolution astrophotography.
How to start choosing the perfect telescope for beginners
Learn how to select the right telescope by comparing refractors and reflectors, understanding aperture, and matching equipment to your observation goals.
Differentiating between refractor and reflector telescopes
Learn the key differences between refractor and reflector telescopes to choose the right optical design for planetary viewing or deep-sky observation.
How a refractor telescope works
Learn how a refractor telescope uses lenses to gather light, its advantages in contrast and maintenance, and how APO designs correct chromatic aberration.